Rivian On The Edge

The Goal
Section titled “The Goal”Scheduling pods to my whip and having them succesfully come up and bound to my peripherals as an edge node changes the way I drag my foot when I walk. Allowing for the same declarative control I use when scheduling agentic pods in my professional life. Instead of managing messy, brittle services directly on the host, I use Kubernetes nodeSelector labels to target the scheduling on the node that has the my hardware peripherals, which in this case is the onboard Raspberry Pi 5. This setup allows me to map radio, telemetry, and any other USB-connected devices directly into the pod’s filesystem via hostPath volumes. It’s a significantly cleaner architecture that provides better isolation and portability.
Its also super nerdy to be running my Rivian as a Kubernetes Node, moreover as a mobile edge compute platform, but I love this.
If you have seen how we network this workload with rivian-tailscale, you know that we can reach this node from anywhere in the world. So why not add it to the cluster and play some games with device redirection in workload?
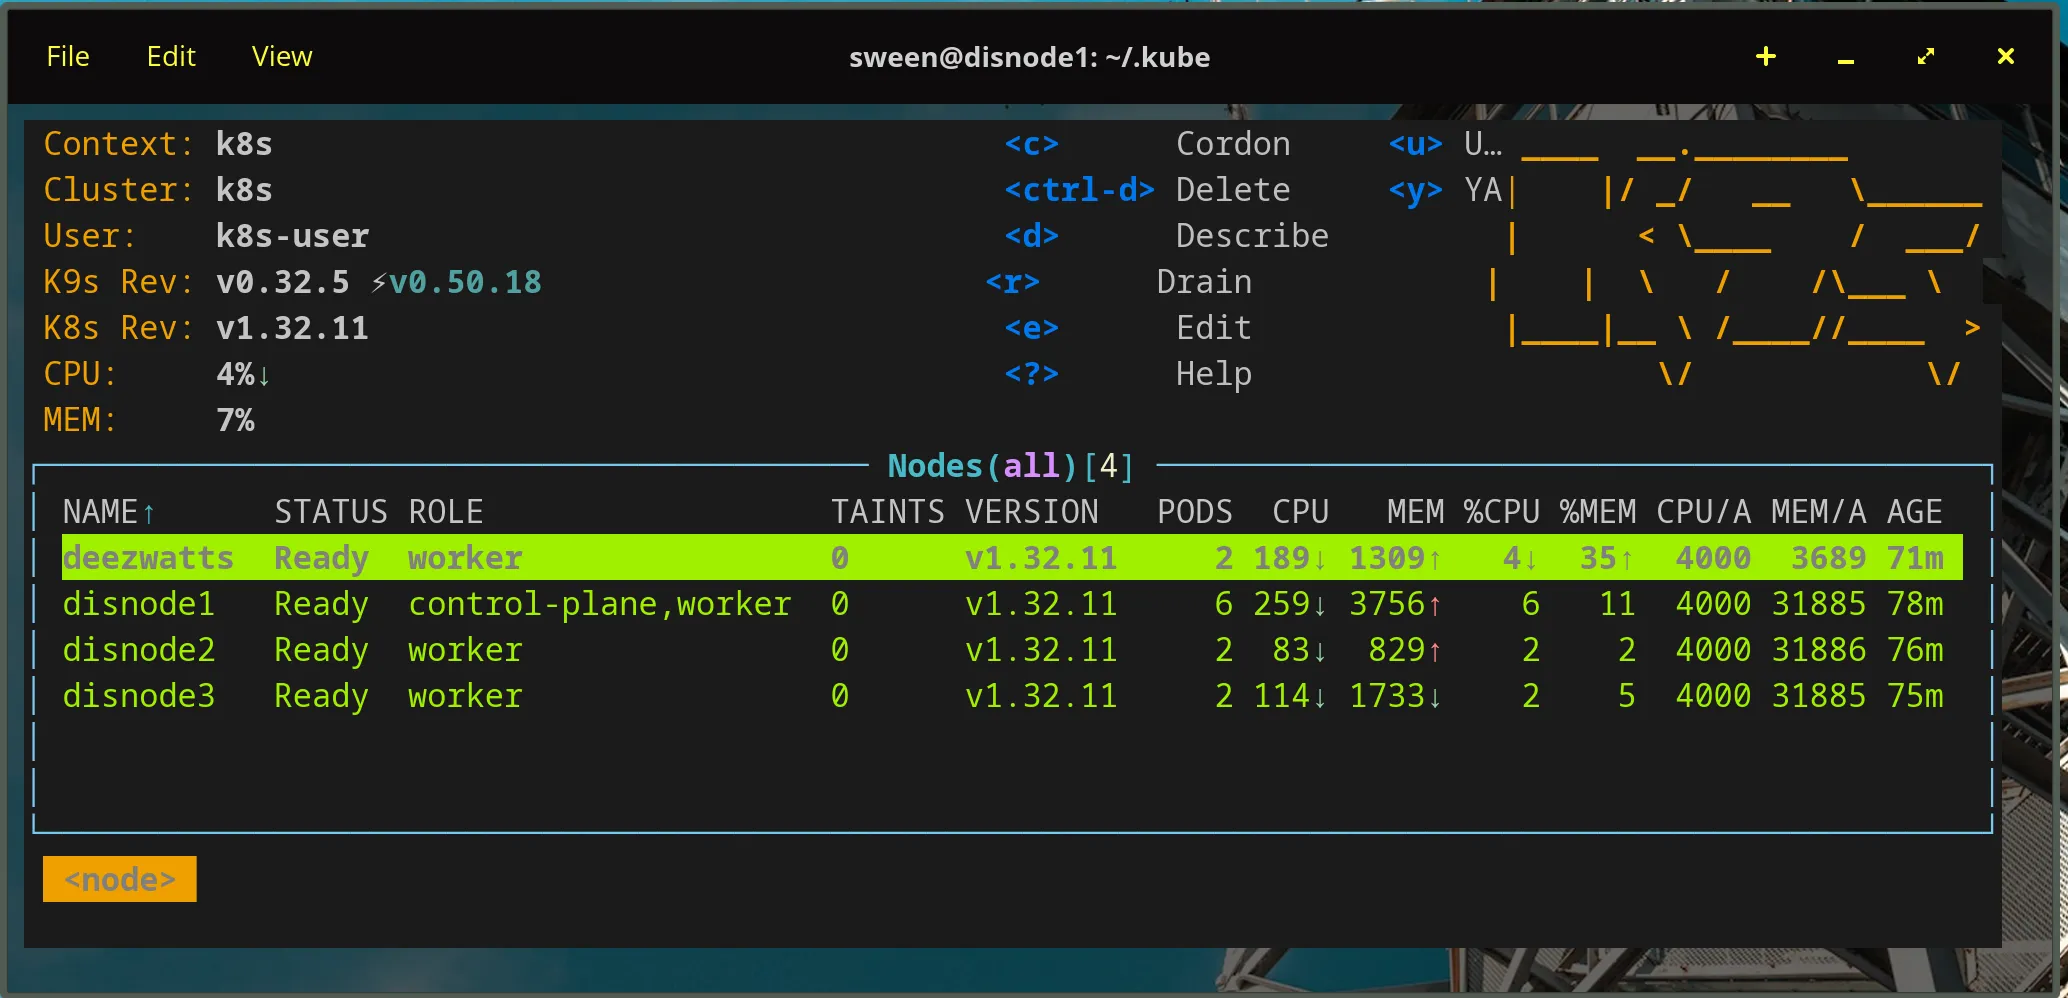
The k8s Cluster
Section titled “The k8s Cluster”Wont go into great detail here, but I run a multi-node k8s cluster on my home network. It consists of a few Intel NUCs and going to add the mobile Raspberry Pi. The Raspberry Pi is the edge node, and it is connected to my Rivian via USB. The Rivian is also connected to my home network via Tailscale.
Instead of using the Tailscale operator, I opted to use the snap package for k8s and bootstrap the api server with my tailnet address.
sudo snap install k8s --classicsudo k8s bootstrap --address 100.127.21.93 # use your tailnet address here for kube apisudo k8s get-join-token --workerThen join it to the cluster from the whip.
sudo snap install k8s --classicsudo k8s join-cluster xxxxxxxxxxxxxxxxxxxxxxxTook a bit, but without issue to get kubelet posting and everything on the cluster:
The Pod
Section titled “The Pod”The podspec for this workload is specifically tuned for the resource-constrained environment of a Raspberry Pi 5 acting as an edge node. The “Magic” lies in the nodeSelector, which ensures the pod is scheduled exclusively on the hardware node where the radio peripherals are physically connected. To interact with these devices, the container runs in a privileged security context, granting it the necessary permissions to access /dev/ttyUSB0 and other host-level serial paths. Efficiency is paramount on the Pi, so we utilize the python:3-slim image—a lightweight distribution that provides a full Python environment while keeping the disk footprint minimal and reducing memory overhead. Finally, because this is a long-running collection service, the command and args are configured to keep the container alive indefinitely, ensuring the pod remains in a Running state even if the initial collection logic completes its cycle.
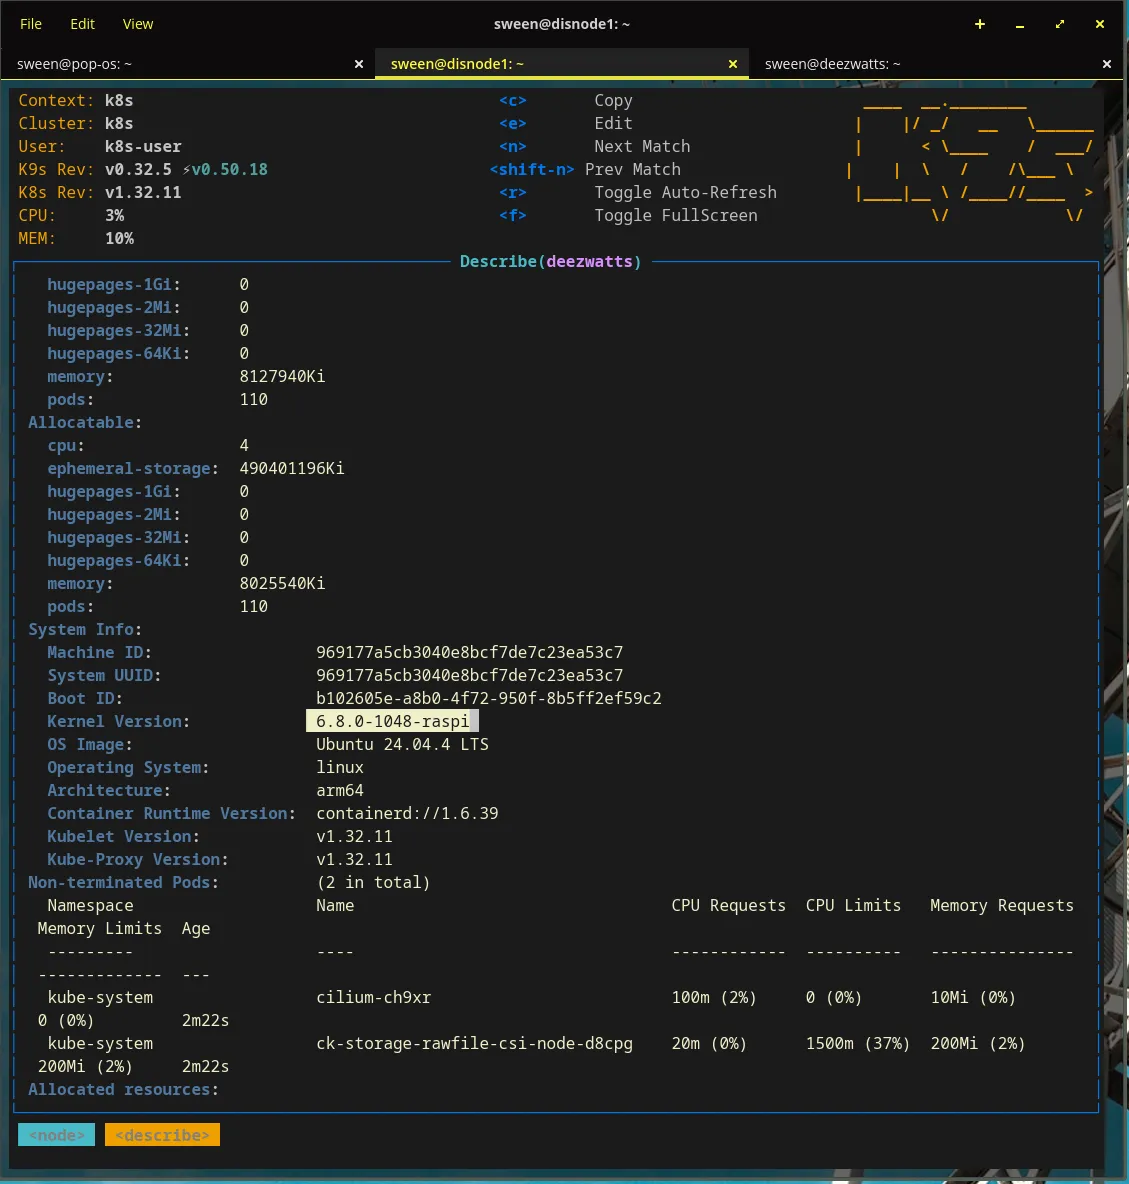
The Node
Section titled “The Node”pi5’s are remarkably powered for the size, and can handle a surprising amount of work.
Device Affinity
Section titled “Device Affinity”Now, when we schedule to the node, we need to make sure that the pod is scheduled on the node where the radio peripherals are physically connected.
Finding the USB device path on the host
sween@deezwatts:~$ ls -l /dev/serial/by-id/total 0lrwxrwxrwx 1 root root 13 Mar 13 12:47 usb-Seeed_Studio_TRACKER_L1_E932C54FC74B4939-if00 -> ../../ttyACM0Once you got it, you can use it in your pod spec and mount it.
apiVersion: v1kind: Podmetadata:  name: deezwatts-meshtastic  namespace: deezwattsspec:  # This is the "Magic" that links the pod to the hardware node  nodeSelector:    deezwatts.com/radio: "true"
  containers:  - name: python-meshtastic    image: python:3-slim    # This command keeps the container running indefinitely    command: ["/bin/bash", "-c", "--"]    args: ["while true; do sleep 30; done;"]    securityContext:      privileged: true # Required to access /dev/ttyUSB0    volumeMounts:    - mountPath: /dev/ttyUSB0      name: usb-radio
  volumes:  - name: usb-radio    hostPath:      path: /dev/serial/by-id/usb-Seeed_Studio_TRACKER_L1_E932C54FC74B4939-if00      type: CharDevice
Now deploy it… it doesnt matter if the whip is at Costco, at home, or at the office, if I can reach the node in the cluster, we can deploy to it.
The deployment process follows a standard Kubernetes workflow but with a critical emphasis on hardware affinity. First, we manually label the deezwatts node with a custom key-value pair, explicitly identifying it as the host equipped with the required radio peripherals; this satisfies the nodeSelector in our manifest and prevents the pod from being scheduled on a node without physical access to the serial devices. Next, we establish a dedicated deezwatts namespace to isolate our edge-specific resources and maintain cluster hygiene. Finally, we apply the configuration file, prompting the control plane to orchestrate the container’s lifecycle. By leveraging this declarative model, we abstract away the complexity of the vehicle’s underlying network, allowing the pod to initialize and bind to its peripherals seamlessly whether I’m parked in my driveway or field-testing at a remote location.
sween@disnode1:~/.kube$ kubectl label nodes deezwatts deezwatts.com/radio=truenode/deezwatts labeledsween@disnode1:~/.kube$ kubectl create ns deezwattsnamespace/deezwatts createdsween@disnode1:~/.kube$ vi deezwatts-meshtastic.yamlsween@disnode1:~/.kube$ kubectl apply -f deezwatts-meshtastic.yamlWooot!
